Two Steps From Heaven
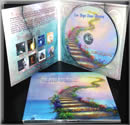
Classical Crossover

Sacred Choral Music
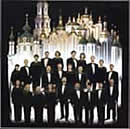
by Kiev Chamber Choir
Video:
Ukrainian Folk Music
Free Dog Clipart
Classical Crossover
Sacred Choral Music
by Kiev Chamber Choir
Video:
Ukrainian Folk Music
Free Dog Clipart
Russian Orthodox Church Sacred Choral Music on Amazon
ALL ABOUT
AVE MARIA LYRICS
Celine Dion: What Does She Sing?
MOBILE WEBSITE
 DOWNLOAD THIS SONG FOR FREE You won't find this song anywhere on the Internet. CHAPTER 3 : Recording tips from the Pros Move Around the Room Angle Your Amp Play with Mic Placement & Angles Get the Air Moving Focus the Energy Multiple Mics Re-amping. As we’ve already touched on, experimenting is the best way to determine the recording techniques that work best for you and your studio. There are many basic rules, and definite acoustic anomalies you need to be aware of (and typically avoid), but being good at capturing tones and sounds is largely a matter of practical experience. That said, as someone working in a home studio environment, don’t be afraid to bring in external resources to help you record — a little bit of money can go a long way. If you can’t execute the recording of a drum part because of space or microphone limitations, cut the drums in a local studio and have them give you a stereo mix to work with. If you need help recording vocals, working with an experienced engineer will help you better understand the process and enable you to hit the mark on your own the next time you record. Of course, you’re ready to record now - so here are some basics to keep in mind to help you make the most of your home recordings. Move Around the Room Move around the room before you hit record and capture an instrument’s tone to tape for osterity, take the time to physically move the instrument or amplifier to different parts of the room and listen to how it sounds. Playing an instrument in different parts of the room can make a big difference in the tone. If you’re recording an acoustic guitar, violin, piano, sax, or any acoustic instrument, and you play it near a wall with a lot of glass and wood, you’ll get a more reflective sound than if you’re up against a baffle. If you’re recording an amp, play around with different spots until you get the right tone for the track. Angle your amp Raising an amp off the ground or angling it can have dramatic effects on the tone, depending on the room and the amp. The floor may be wood, and it may have a resonant cavity below that’s diminishing your low end, or adding more because it’s vibrating. By pulling the amp off the floor and putting it on a stand, essentially you’re decoupling it. Even if you’re angling it, only part of the amp is touching the floor, so you’re basically removing the floor from the equation in terms of the tone. “If you have an amp perpendicular to the floor, all the energy is going forward, and low to the ground,” says Weiss. “Let’s say you’ve got an eight-foot ceiling. You’ve got many more mic placement options if the amp is kicked up at a 45-degree angle. Now you can put a mic up in the corner to get more of the room. If you’re going for a really tight sound, you might just want to leave it on the floor, focus the energy, and take the room out of the equation. A professional studio is going to have a floor built specifically so that it won’t have pockets of resonance underneath. Your home studio probably won’t be as predictable, so finding the right spot and the proper angle can make an enormous difference.” |
HOW TO MAKE HOME
|
DOWNLOAD THIS SONG FOR FREE
You won't find this song anywhere on the Internet.
HOW TO MAKE HOME RECORDING STUDIO