Two Steps From Heaven

Classical Crossover

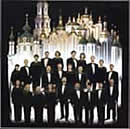
Sacred Choral Music
by Kiev Chamber Choir
Video:
Ukrainian Folk Music
Free Dog Clipart
Classical Crossover
Sacred Choral Music
by Kiev Chamber Choir
Video:
Ukrainian Folk Music
Free Dog Clipart
Russian Orthodox Church Sacred Choral Music on Amazon
ALL ABOUT
AVE MARIA LYRICS
Celine Dion: What Does She Sing?
MOBILE WEBSITE
 DOWNLOAD THIS SONG FOR FREE You won't find this song anywhere on the Internet. CHAPTER 2 : Getting Started Focus on Your Instrument Experiment Keep it Simple Get it Hot Target Your Frequency Gain Staging Limit Compression & EQ When Recording Avoid Phase Cancellation Experiment There is one constant, true for all recording studios and situations: keep experimenting. The only way to know what sounds good and what to avoid in your home studio is to try different approaches to the same scenario. So much of the art of engineering, producing, and recording comes from trial and error and constantly honing your ears and your technique. “I’ve learned a lot watching creative engineers at work,” says Drew Raison. “Steve Albini worked in my studio, and he was laying microphones just above floor level. There’s an evil little echo, that first reflection echo you are typically trying to avoid. He wanted to harvest that. To me, that was a huge question mark. Why would you want to do that? And then I heard it and I was like, ‘Well, boy, there it is.’ It is an acquired taste, but his management of acoustic space was eye-opening. “I rarely use what I learned from him in my own recordings because I’m not looking for a radical departure from a given tonality, but you should never hesitate to experiment. This is your opportunity. Analyze and decide, ‘Did this work or didn’t it?’ and ‘What can I do to make it better next time?’ That’s what makes a home recording enthusiast become a producer over time.” Keep it simple Don’t run too many devices in series with one another. Limiting the number of components in your chain will usually provide a fatter tone. If you’ve got a mic preamp, an EQ, and a compressor in the signal chain, you’re probably doing that for a reason, but sometimes that can negatively affect the sound. If you’re not happy with the tone you’re getting on record, try going right out of the preamp into the console and deal with the EQ and compression later. Sometimes simplicity is the way to go, and getting a more natural tone to tape should be the goal. Get it hot, hot, hot Always try to get the hottest signal you can to tape. If you don’t, you’re missing out on some of the sound from the source. Get the level as hot as you can without going over the threshold. Some A/D converters have a feature called a soft limit, which can help with this. “Let’s say you have a really dynamic part, a section of the song where the vocalist is hitting it a little too hard,” explains Weiss. “You can try to anticipate the trouble spots and pull the gain down on the preamp a little, or you can use soft limiting. It’s kind of like compression but it just limits the output of the digital signal.” Target your frequency When you’re recording and mixing, you don’t want to have lots of overlapping frequencies. If you’re cutting percussion, for instance, and you don’t need anything below 80 Hz, you can use a high pass filter and allow the highs to pass through while cutting off the low frequencies so you’re focusing that instrument into the frequency range you want it to occupy in the mix. Maybe the air conditioner that’s blowing air in your direction is producing low frequency rattle, or the artist who’s tapping her foot or moving around in the studio is producing low frequency energy that doesn’t need to be recorded. A high pass filter can eliminate those requencies from the recording. Conversely, if you’re recording bass guitar, you probably don’t need all of the top end, so take some off the top with a low pass filter. Filtering out the frequencies that don’t need to be there will help keep the mix articulate and clean. |
HOW TO MAKE HOME
|
DOWNLOAD THIS SONG FOR FREE
You won't find this song anywhere on the Internet.
HOW TO MAKE HOME RECORDING STUDIO