Two Steps From Heaven
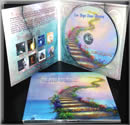
Classical Crossover

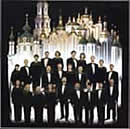
Sacred Choral Music
by Kiev Chamber Choir
Video:
Ukrainian Folk Music
Free Dog Clipart
Classical Crossover
Sacred Choral Music
by Kiev Chamber Choir
Video:
Ukrainian Folk Music
Free Dog Clipart
Russian Orthodox Church Sacred Choral Music on Amazon
ALL ABOUT
AVE MARIA LYRICS
Celine Dion: What Does She Sing?
MOBILE WEBSITE
 DOWNLOAD THIS SONG FOR FREE You won't find this song anywhere on the Internet. CHAPTER 4 : How to record in your home studio Acoustic Guitar Electric Guitar Bass Guitar Piano Brass & Reed Instruments Vocals Drum Kit Drum Kit Recording a full drum kit in a home studio poses numerous challenges. Employing multiple mics requires owning numerous microphones, stands, and cables — not to mention utilizing the proper placement and techniques to avoid phase problems, room anomalies, and acoustic issues. Recording stellar drum kit tracks requires skill, patience, and the right room. But that doesn’t mean you can’t record drums at home. One consideration is to use fewer microphones. Sometimes just a kick microphone, and a stereo pair — either overhead, in front of, or behind the drummer — can provide functional tonality and stereo image. Adding another mic for snare is also an option, and taking the time to be creative with your mic placement and source monitoring to ensure you’re capturing a well-balanced mix is key. Tuning the drums before a session is also of huge importance. “I sometimes work with drummers for hours to get their drums tuned to where I think they’re going to reproduce correctly to tape,” says Weiss. “It’s not uncommon for a drummer to have their kit tuned to where they practice and gig with it, and it sounds great. Then you put a mic on the tom in a studio setting and it’s ringing like mad. Getting the drums ready for recording is an important step.” Another consideration, not specific to tone, but rather to performance, is to use a click track. If it’s a jazz track, or something more organic that needs room to ebb and flow with regard to tempo, you can forego this, but a click track not only promotes a solid tempo for the entire song, it enables you to edit and add to the track after the tracks have been recorded. The potential for rearranging parts, swapping sections, adding rhythmic elements, altering arrangements — for the drum tracks and any other — is made possible with the use of a click track. Kick Drum Start by listening to the drum with no muffling. Ideally, the drummer has a hole in the front head (or has removed it) to facilitate the removing and adding of muffling material. Make sure the beater head is evenly tuned before adding muffling. Thin sandbags work very well as a muffling agent in a kick drum. Pillows, sweatshirts, foam, and blankets can also be used, though be aware that some of these materials can absorb some of the high frequency energy of the drum’s tone. Mic techniques can run a gamut of possibilities, but placing one microphone inside the middle of the drum, pointed at the beater at a 45-degree angle, is a standard place to start. For a more “tappy” sound, push the mic closer to the head. Using a disc or even taping a coin to the beater side of the drum will also increase that slapping sound of the beater striking the drum. Adding a second mic, placed a foot or more in front of the front head, is an option, as is isolating that mic with a heavy blanket or pad. “I’ll make a teepee,” says Weiss. “I’ll take a boom mic stand at a 90-degree angle, and place the arm of the boom on top of the kick drum — making sure there’s foam or something between the stand and the drum so I don’t scratch the drum. Then I take a heavy blanket, like a moving blanket, and make a tent out of it. At the end of the tent, I put a shotgun microphone, and that’s where I get the extended low end. You can use any mic, but I prefer the sound of the shotgun. If you have the mics and the inclination, you can even add an additional mic on the beater side of the drum.” How to record Snare Drums, Toms, Overheads Next Chapter |
HOW TO MAKE HOME
|
DOWNLOAD THIS SONG FOR FREE
You won't find this song anywhere on the Internet.
HOW TO MAKE HOME RECORDING STUDIO